Vermont Sleep Sounds & Music Brings Relaxing Spatial Audio Soundscapes to the Apple TV
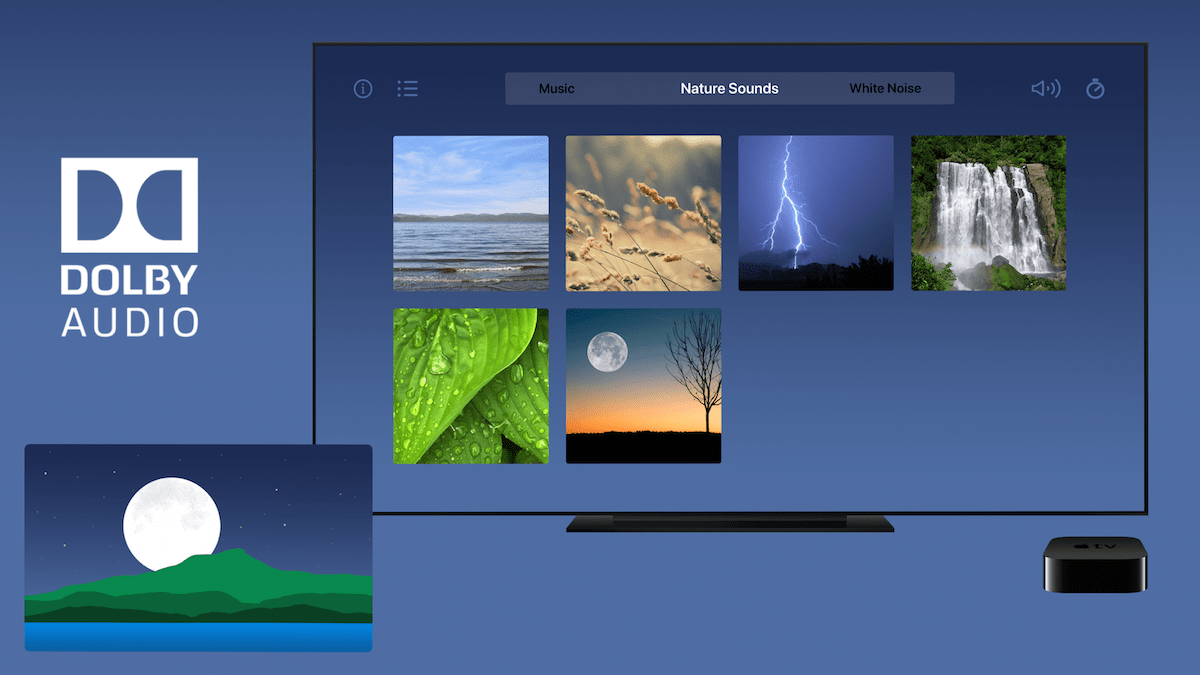
Vermont Sleep Sounds & Music for tvOS and Apple TV features original recordings of music, nature and white noise sounds, meticulously hand-crafted for quality and produced for spatial audio to take advantage of home theater equipment such as surround speakers, sound bars, and even Apple HomePods.
Spatial Audio for Relaxing
Vermont Sleep Sounds & Music is the first app of its kind to include support for spatial audio with Dolby Digital surround sound, allowing Apple TV users to effectively transform their living room or home theater space into the ultimate relaxation getaway.
The app is also unique in that many of the sounds offer variable options to allow user to customize their own sleep soundscape. For example, fan sounds all have various speed settings and the rain sounds are offered as with or without thunder. A mixer page allows users to blend sounds and set custom audio levels, and the sleep timer features a slow, gentle fade.
Vermont Sleep Sound & Music Features
- Configurable sounds let allow adjustment of fan speeds, selection of wind intensity, or even allow the user to toggle thunder on or off for rain sounds.
- Spatial audio with Dolby Digital surround sound support enhances the listening experience to help users escape their surroundings.
- Music tracks feature a soothing mix of tranquil piano and classical guitar melodies. Perfect for meditation or drifting off to sleep.
- Mixer page lets users blend white noise, rain, or other sounds as desired to create their own personal mix.
- Users can save their custom soundscapes to create playlists for any occasion.
- A single in-app purchase unlocks all current and future sounds.
Subscription-free Pricing
Vermont Sleep Sounds & Music is available as a free download where users can try out all core sounds sounds, explore the customizable options, and even audition Dolby surround options. A single in-app purchase unlocks all available and future sounds.
Vermont Sleep Sounds & Music is available for iPhone, iPad and Apple TV as a free download on the Apple App Store.
Test Spatial Audio on AirPods Pro with Surround Speaker Check
In this article, we’ll discuss how to test spatial audio on Apple’s AirPods Pro, AirPods Max headphones and new 3rd gen AirPods using Surround Speaker Check app for iOS.
Recommended: Surround Speaker Check [Free]
With iOS 14, Apple introduced a new audio option for AirPods Pro and AirPods Max products called spatial audio, a feature designed to bring a theater-like surround sound experience to movies and videos. However, determining whether spatial audio is actually enabled and working is not always as straight-forward a process as it seems. Read on to learn how Surround Speaker Check provides a great way to try out and experience the amazing sound of spatial audio! Update: Surround Speaker Check spatial audio tracks are also compatible with Apple’s new 3rd gen AirPods!
How it works
Spatial audio works by converting Dolby Digital 5.1, 7.1, and even Atmos soundtracks into a virtualized soundstage for headphones, complete with dynamic head-tracking to keep content “locked in place” to your mobile device. However, since the effect of spatial audio can vary greatly depending on the media source, many people are naturally looking for content which can best showcase the effects of spatial audio and Apple’s head tracking feature. Enter Surround Speaker Check.
Test your spatial audio
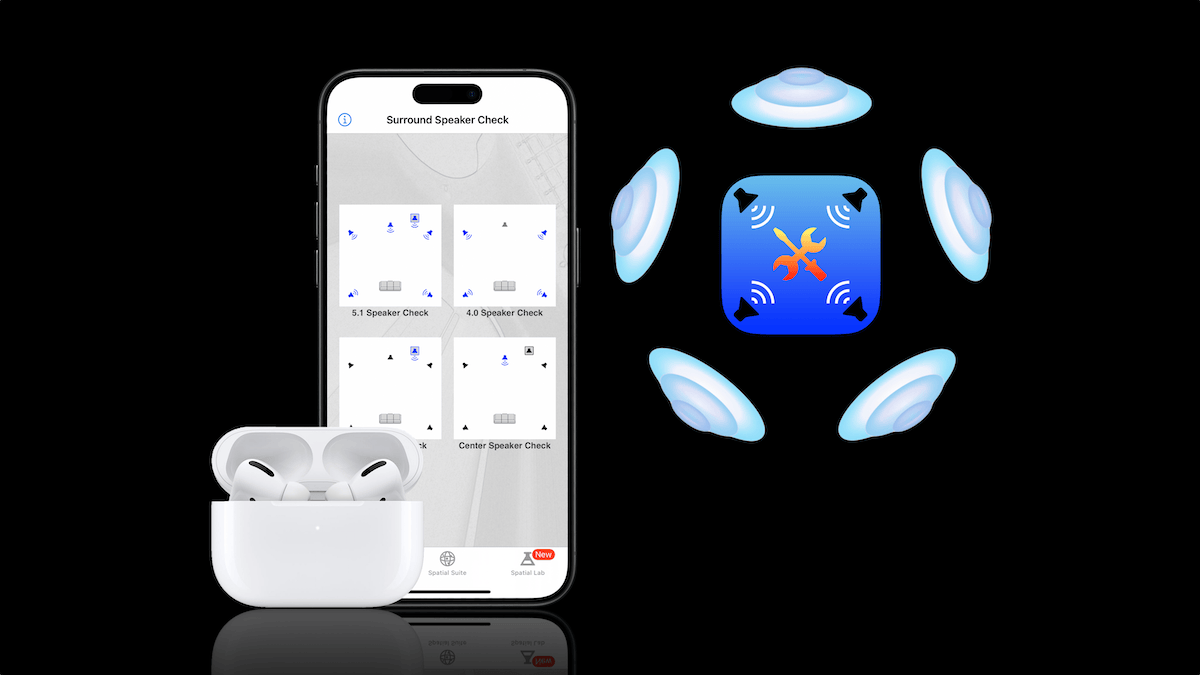
Originally designed as an Apple TV app for testing home theater systems, Surround Speaker Check is finding a new calling as a test platform for spatial audio. Only instead of testing speaker functionality, the app’s isolated speaker tracks allow users to experience exactly how Apple’s spatial audio feature can process surround sound on AirPods Pro and AirPods Max, and whether spatial audio is working properly.
“Center Speaker Check” provides a great in-your-face example of Apple’s head-tracking feature in action
The free “5.1 Speaker Check” test track demonstrates the surround sound capabilities of spatial audio by using specially-produced music tracks to isolate the front and rear speakers one-at-a-time. During playback, on-screen graphics coordinates with the audio to let you know which speakers are being featured. “4.0 Speaker Check”, also a free track, offers a similar test using a blues-style music track mixed with the ambience of a packed music hall. “Center Speaker Check” (a 0.99 IAP) focuses on dialogue anchored to the center channel, resulting in a great way for viewers to clearly experience Apple’s spatial audio head tracking feature in action.

Compare and hear for yourself
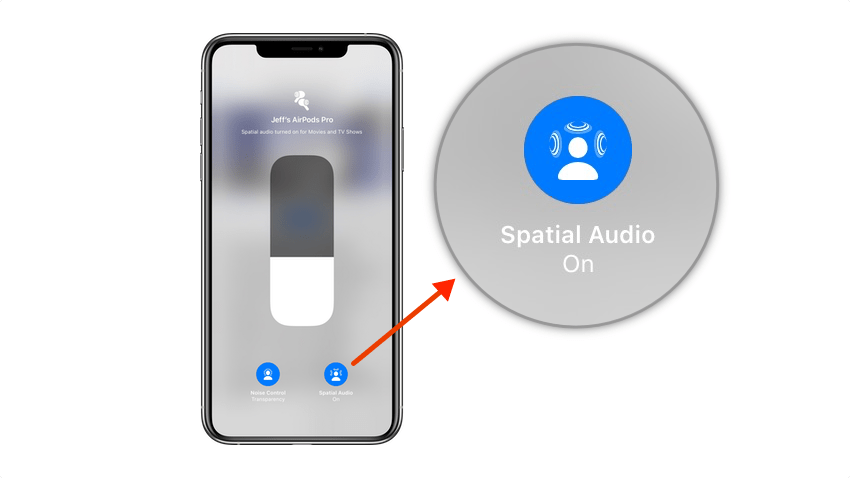
To best hear the difference between regular audio and spatial audio, users can toggle the spatial audio feature on and off during playback via the Spatial Audio button in the iOS volume control page. To find the Spatial Audio button, swipe down from the upper right corner of your iPhone or iPad to get the Control Center overlay. Next, touch and hold on the volume control until the volume control page opens to fill the whole screen. Here is where you’ll find the spatial audio buttons (see image below). Alternatively, you can access the spatial audio controls in the Settings app, under the Bluetooth tab. Note, however, that the iOS spatial audio buttons will only appear when your AirPods are connected to a compatible iPhone or iPad.
While Apple’s new spatial audio feature for AirPods Pro and AirPods Max offers an unparalleled listening experience when watching movies and videos, be aware that not all content will support spatial audio even if the feature is turned on for your device. (You can see if content supports spatial audio by checking the volume control page described above.) Furthermore, streaming service apps such as Netflix or Disney+ sometimes experience bugs which affect audio quality. Since Surround Speaker Check uses the same Dolby Digital surround sound file format as Apple’s movies and TV shows, the app can help you troubleshoot whether or not spatial audio is working properly on your device, or if the problem lies with the streaming service.
Surround Speaker Check is available as a free download in the iOS and tvOS App Stores.
Vermont Sleep Sounds & Music Adds Spatial Audio Support for AirPods Pro
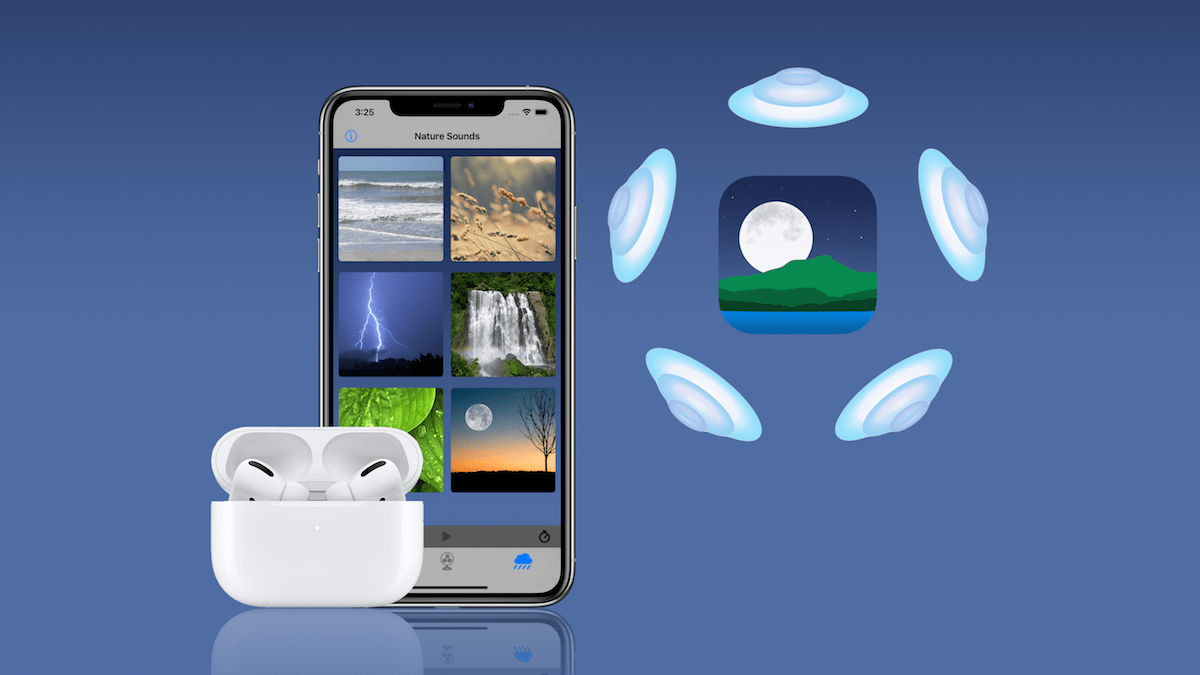
The latest update to Vermont Sleep Sounds & Music adds support for Apple’s Spatial Audio feature, giving AirPods Pro and AirPods Max users the ability to enjoy relaxing soundscapes in an immersive surround sound experience.
Spatial Audio is a Game-Changer
Vermont Sleep Sounds & Music is a pioneering app in being the first iOS app of it’s kind to provide support for Dolby Atmos, an audio format designed to to present a richer, more immersive listening experience. Up until now, however, playback of Dolby Atmos content within the app was limited to an iOS device’s own speakers, with headphones defaulting to a stereo or binaural mix of the multichannel audio source. With the new Spatial Audio feature added in iOS 14, Vermont Sleep Sounds & Music users with AirPods Pro can finally take advantage of Dolby Atmos when creating their own surround soundscapes for relaxing. (Apple is expected to expand support for Spatial Audio to other devices in the near future.) Update: Vermont Sleep Sounds & Music Dolby Atmos spatial audio tracks are also compatible with Apple’s new 3rd gen AirPods.
Spatial Audio expands the level of customization within the app
Users of iPhones and iPads often seek out white noise, nature, or other similar ambient sound relaxation apps for a variety of reasons, be it to help cope with stress and anxiety, to help them unwind before bedtime, or as a means to aid in mindfulness or meditation. Whatever the reason, everyone seems to have their own favorite sound which helps them best unwind. Vermont Sleep Sounds & Music offers a large variety of sounds and relaxing music, and the app gives users an unprecedented level of control in creating their own sonic soundscapes. Many sounds have selectable parameters such as variable speeds for fans, different size waterfalls, and even the option to toggle thunder on or off during rain sounds. The addition of Spatial Audio expands the level of customization within the app by giving users yet another variety of sound to select from when building their own personal soundscapes.
New features for iOS 14
Along with Spatial Audio, Vermont Sleep Sounds & Music has recently gained additional features for iOS including support for Dark Mode, the ability to save custom playlists, and support for Siri Shortcuts. Custom shortcuts are even compatible with the new Wind Down feature added to the Health app in iOS 14. A full list of app features is available on the Vermont Sleep Sounds & Music App Store page. (see link below)
Vermont Sleep Sounds & Music is available as a free download for iPhone and iPad on the Apple App Store.
Vermont Sleep Sounds & Music Uses Dolby Atmos Immersive Audio to Help Promote Sleep

Vermont Sleep Sounds & Music features original recordings of music, nature and white noise sounds, meticulously hand-crafted for the highest quality and effectiveness on mobile devices. The iOS app is the first of it’s kind to include support for Dolby Atmos, a new feature on iPhones and iPads which takes advantage of multiple speaker arrays to present a richer, more immersive audio experience.
Not Your Typical Sleep App
Beyond it’s innovative support for Dolby Atmos audio, Vermont Sleep Sounds & Music is also unique in that many of the sounds offer variable options to allow user to customize their own sleep soundscape. For example, fan sounds all have various speed settings and the rain sounds are offered as with or without thunder. A mixer page allows users to blend sounds and set custom audio levels, and the sleep timer features a slow, gentle fade.
Vermont Sleep Sound & Music Features
- Configurable sounds let users adjust fan speeds, select wind intensity, or even toggle thunder on or off for rain sounds.
- Dolby Atmos support enhances speaker or headphone experience to help users escape their surroundings.
- Music ambiance tracks feature a mix of tranquil piano and classical guitar melodies. Perfect for meditation or drifting off to sleep.
- Mixer function allows users to blend sounds and set custom audio levels.
- Supports all Airplay 2 and Bluetooth devices including Apple TV, AirPods, and HomePod.
- Subscription-free business model. A single in-app purchase unlocks all current and future sounds.
Pricing and Availability
Vermont Sleep Sounds & Music is available as a free download iPhones and iPads on the Apple App Store. A single in-app purchase unlocks all current and future content.
Surround Sound Ear Candy Reimagines James Bond Theme for the Apple TV
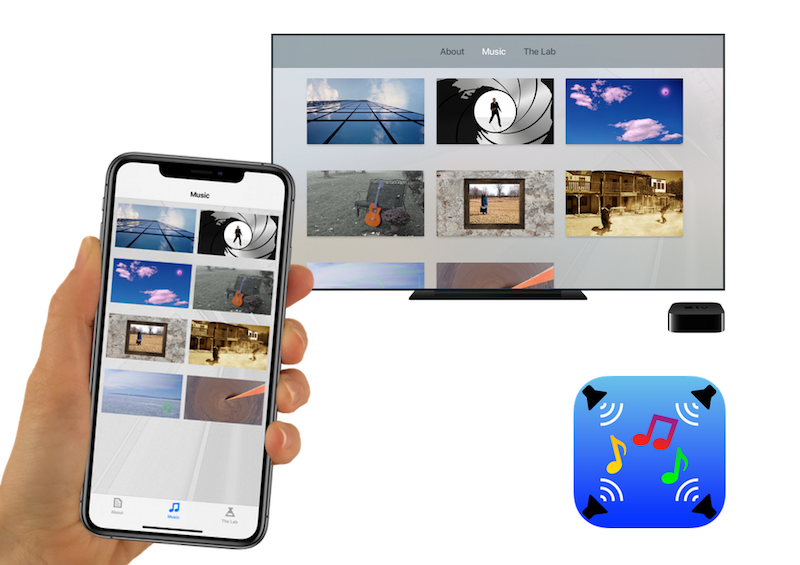
The latest Surround Sound Ear Candy app update brings three new surround sound music tracks, including a reimagined version of the famous James Bond Theme. From the production notes:
James Bond Theme reimagines the famous movie soundtrack as a 64-piece orchestra comprised entirely of guitars! A dramatic bass drop in the song’s introduction provides a cinematic element while familiar “007” musical motifs split off into various speaker positions on the surround soundstage. This arrangement features a heavy emphasis on modern surround production while staying true to the time-honored themes originally composed in 1962 by Monty Norman.
The update also includes two other surround sound music tracks, titled Reflection and Walk the Plank.
Reflections features specially-timed delay effects used to create unique, musical-sounding echoes designed to envelope and surround the listener as the melody unfolds. These immersive surround sound effects were inspired by delay effect techniques pioneered by legendary guitarist The Edge for his mesmerizing guitar riffs on U2 hits such as "Where the Streets Have No Name" and "Pride (In the Name of Love)."
Walk the Plank is a short orchestral arrangement inspired by the “Pirates of the Caribbean” soundtrack, and joins Surround Sound Ear Candy’s library of bonus “experimental” surround sound content.
Surround Sound Ear Candy is available as a free download for iPhone, iPad, and the Apple TV.